When there’s no savings, every surprise becomes a crisis. The car won’t start, and the repair goes on a credit card. A slow month at work turns into a late rent payment.
An emergency fund is the buffer between you and those moments. And if you’re starting at $0, the full goal of several months of expenses can feel so far away that it’s hard to begin.
So don’t start there. This guide breaks it into four levels, starting with $1,000. You’ll also get ideas for finding the money on a tight budget, where to keep it, and a quick check for when it’s okay to use it.
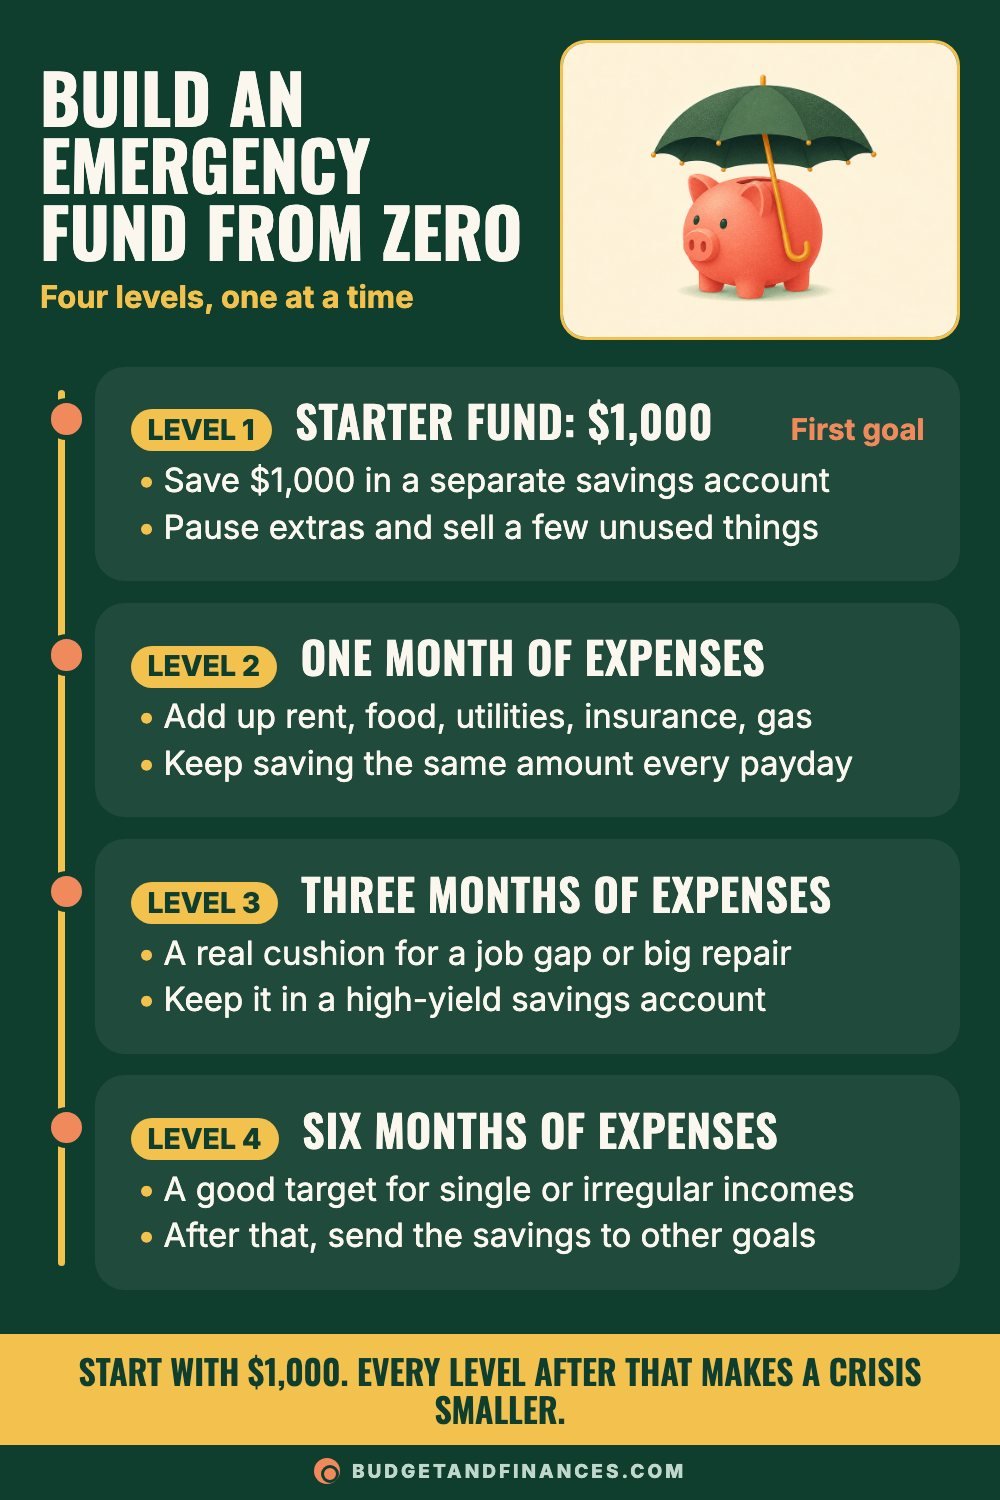
Build an emergency fund in four levels
Each level makes the next crisis smaller. Finish one before you think about the next.
Level 1: Starter fund of $1,000
This is your first goal.
- Save $1,000 in a separate savings account, away from your everyday checking.
- Pause extras for a while and sell a few unused things to get there faster.
A $1,000 starter fund won’t cover everything. It will cover a lot of the small emergencies, like a car repair or an urgent appointment, that would otherwise end up on a card.
Level 2: One month of expenses
- Add up your essential monthly costs: rent, food, utilities, insurance and gas. Include minimum debt payments and childcare if you have them.
- Keep saving the same amount every payday.
Use essential costs here, not your full income. This is what you’d need to keep the lights on and food on the table if your pay stopped.
Level 3: Three months of expenses
- This is a real cushion for a job gap or a big repair.
- Keep it in a high-yield savings account.
Level 4: Six months of expenses
- This is a good target for single incomes or irregular incomes.
- After that, send the savings to other goals.
Some households, like two-income homes with steady jobs, may decide three months is enough. Others, like self-employed people, may want more than six.
Worked example: from $0 to six months
Say your essential costs add up to $2,500 a month, and you’re paid twice a month.
Level 1: You set up an automatic transfer of $100 each payday. At $100 a paycheck, $1,000 takes 10 paychecks, or about 5 months. Selling a few things or saving part of a tax refund gets you there sooner.
Level 2: One month of expenses is $2,500. You already have $1,000, so you need $1,500 more. At $100 a paycheck, that’s 15 more paychecks.
Level 3: Three months is $7,500. From $2,500, that’s another $5,000. If a raise lets you move to $200 a paycheck, it takes 25 paychecks.
Level 4: Six months is $15,000.
That full goal takes time, and that’s normal. Every level you finish means one less crisis has to go on a card.
The $1,000 starter emergency fund chart
If saving the same amount every week isn’t realistic for you, this chart helps. It has 38 boxes in four sizes:
- 10 boxes of $10
- 10 boxes of $20
- 10 boxes of $30
- 8 boxes of $50
Together they add up to exactly $1,000.
How to use it: each time you move money to savings, color in a box that matches the amount. Pick any box that fits this week’s budget. On a tight week, fill in a $10 box. When money allows, fill in a $50 box. There’s no order.
Small boxes and big boxes add up to $1,000. When every box is colored, your Level 1 is done.
Where to find emergency fund money
Any dollar counts. Start with whatever you can move today. Here are seven places to look when the budget feels tight.
- Sell what you don’t use. Clothes, baby gear, furniture and electronics can turn into savings fast.
- Save your tax refund. If you get a refund, put all or part of it straight into savings.
- Pause a subscription. Cancel one or two for a few months and move that amount to savings.
- Save the raise. When your pay goes up, send the difference to savings before you get used to it.
- Pick up extra hours. Overtime, babysitting, pet sitting or a weekend shift can build a starter fund quickly.
- Round up purchases. Many banks can round up card purchases and move the change into savings.
- Try a no-spend week. Skip all non-essential spending for 7 days and save what you would have spent.
Even a $50 a week habit adds up. At that pace, $1,000 takes 20 weeks.
Where to keep your emergency fund
This money has one job: to be there when you need it. It should be easy to reach, but not too easy to spend.
High-yield savings: a good home for most people
- Kept apart from your everyday spending money.
- Usually earns more interest than checking.
- The balance doesn’t drop with the stock market.
- FDIC insured up to the limit at insured banks. Credit unions have similar federal insurance through the NCUA.
- Money usually reaches checking in a day or two.
Stock market account: better for long-term goals
- The value can drop right when you need the cash.
- Selling in a down market can lock in a loss.
- You may owe taxes on gains when you sell.
- It’s meant for money you won’t need for years.
- It can be a good next step once your fund is full.
Keep emergency cash safe and reachable. Invest the rest. This is educational only, not investment advice.
Is it really an emergency?
Before you touch the fund, ask three questions. Is it unexpected? Is it necessary? Is it urgent? If the answer to all three is yes, use the fund.
Yes, use the fund:
– Job loss. This is what the fund is for.
– Car repair for work. Yes, if you need the car to earn.
– Urgent medical bill. Yes, for care you can’t put off.
– Broken furnace. Heat and safety come first.
– Emergency vet visit. Yes, when it truly can’t wait.
– Family emergency trip. Yes, for an urgent family crisis.
No, save for it separately:
– Holiday gifts. That’s a sinking fund.
– Vacation. Save for it separately.
– Big sale. A good deal isn’t an emergency.
If you saw it coming, it belongs in a sinking fund. That keeps your emergency fund whole for the things you couldn’t see coming.
After you use it
Using the fund is what it’s for, so don’t feel bad about it. Once the emergency passes, go back to your regular payday transfer and rebuild to the level you were at.
Common mistakes
Waiting until you can save a big amount. $10 a week still moves you toward $1,000. Start small and raise it later.
Keeping it in checking. It blends in with spending money and slowly disappears. Use a separate account.
Investing it for a better return. The fund needs to be there in a bad month, and markets can fall in exactly those months.
Using it for expected costs. Gifts, tires and yearly bills belong in sinking funds.
Stopping after one level forever. $1,000 is a starting point. Keep going when you can.
FAQ
Should I build an emergency fund or pay off debt first?
A common approach is to save a $1,000 starter fund first, then focus on paying off debt, then build the full fund of 3-6 months. The starter fund keeps a small surprise from going on a card while you pay debt down.
How much should my emergency fund be?
A common guideline is 3-6 months of essential expenses. Two stable incomes may lean toward 3 months. Single incomes, self-employment and irregular pay often call for 6 months or more.
Where should I keep my emergency fund?
Many people keep it in a separate high-yield savings account at an insured bank or credit union. It stays apart from spending money, it doesn’t fall with the stock market, and you can usually get to it within a day or two.
What if I have to use my emergency fund?
That’s what it’s there for. Cover the emergency, then restart your regular savings transfer to build it back up.
This is general education, not personal financial advice.